The background’s only job is to disappear
At 48 to 96 thumbnails a page, anything in the frame that is not your face is competing with your face. That is the entire chapter and everything below is a consequence of it.
Spotlight puts it in their own published guidance, and they explain why in the same breath:
“Wear something simple and avoid props, hats, distracting backgrounds and accessories. Remember, you will mostly be viewed by casting professionals in a grid format so make sure your photo is impactful.”Spotlight, published photo guidance (modified 7 January 2025)
In a grid format. The platform is telling you, in writing, what the viewing conditions are, and almost nobody who writes about headshot backgrounds seems to have read it.
While you are there, note what else Spotlight will actually reject, because these are moderation-enforced and free to avoid: photographs with borders; images carrying a copyright watermark or an embedded photographer credit; guns or other weapons (unless it is a production still); modelling and glamour shots; and screen-grabs. If your photographer hands you back a file with their name burned into the corner, you cannot use it. Ask first.
There is no best background colour, and we are not going to invent one
We went looking for a casting director — any casting director, anywhere — on record naming a background colour. There isn’t one. There is no industry rule, no platform requirement, and no named professional saying grey beats blue.
What there is, is a mechanical criterion, and it comes from a photographer stating it more honestly than the colour-lists ever do:
“Just make sure that there is an adequate contrast ratio between wardrobe, background, and hair.”Marc Cartwright, headshot photographer (LA)
That is the real rule, and the word is separation. The question is never “is grey good?” The question is “can I tell where your head ends and the wall begins?” Ask it that way and every case answers itself:
Dark hair on a dark background — the head merges into the wall and the silhouette dies. Fix it with a separation light behind you, or lighten the background. Light, blonde or grey hair on a white background — the same failure, inverted. A dark garment on a dark background — your body vanishes and your head floats in the frame like a balloon.
And here is the honest reason for the industry’s grey habit, which nobody ever states: mid-grey is the default not because it is beautiful but because it separates almost every hair colour and almost every skin tone from itself. It is a compromise that works on the largest number of people. It is not a standard. It is not a rule. It is a safe bet, and knowing why it is a safe bet is what lets you break it on purpose.
Separation, in three frames
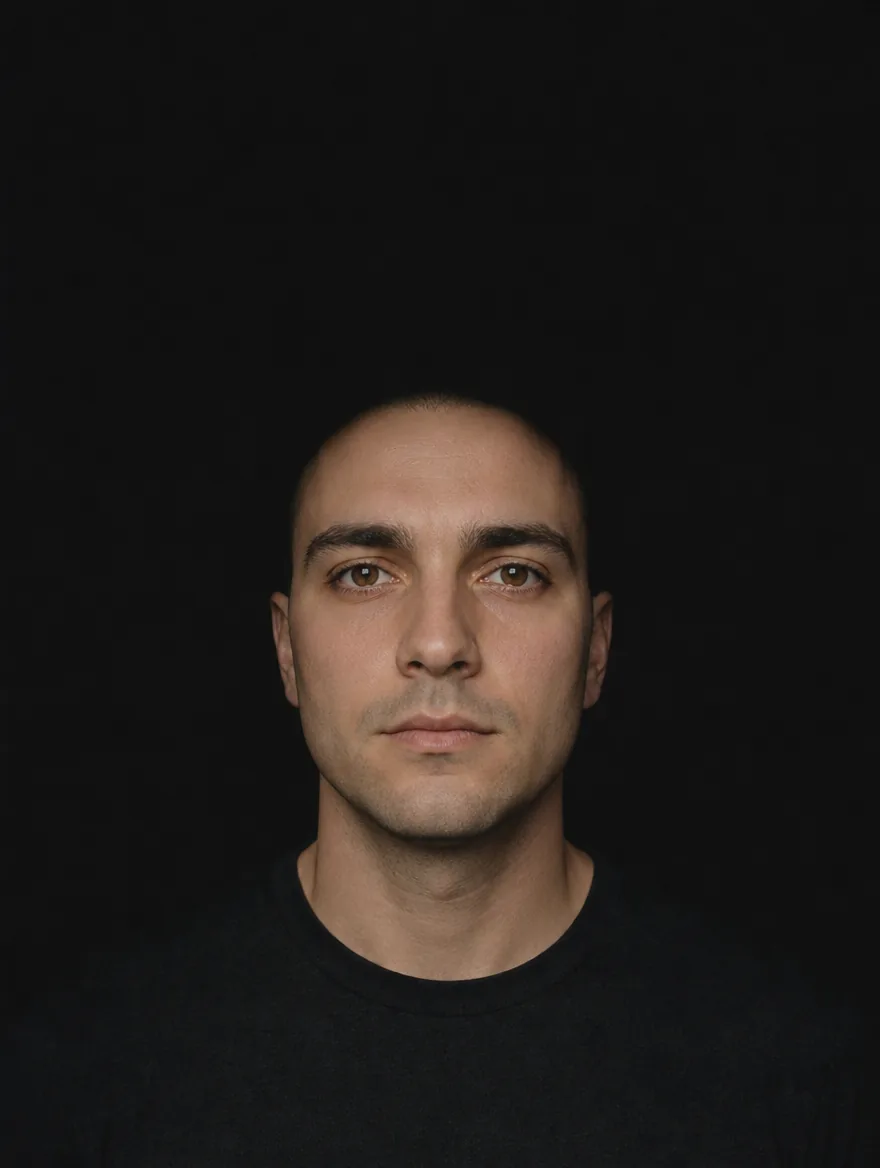
Dark hair, dark wallThe silhouette is gone
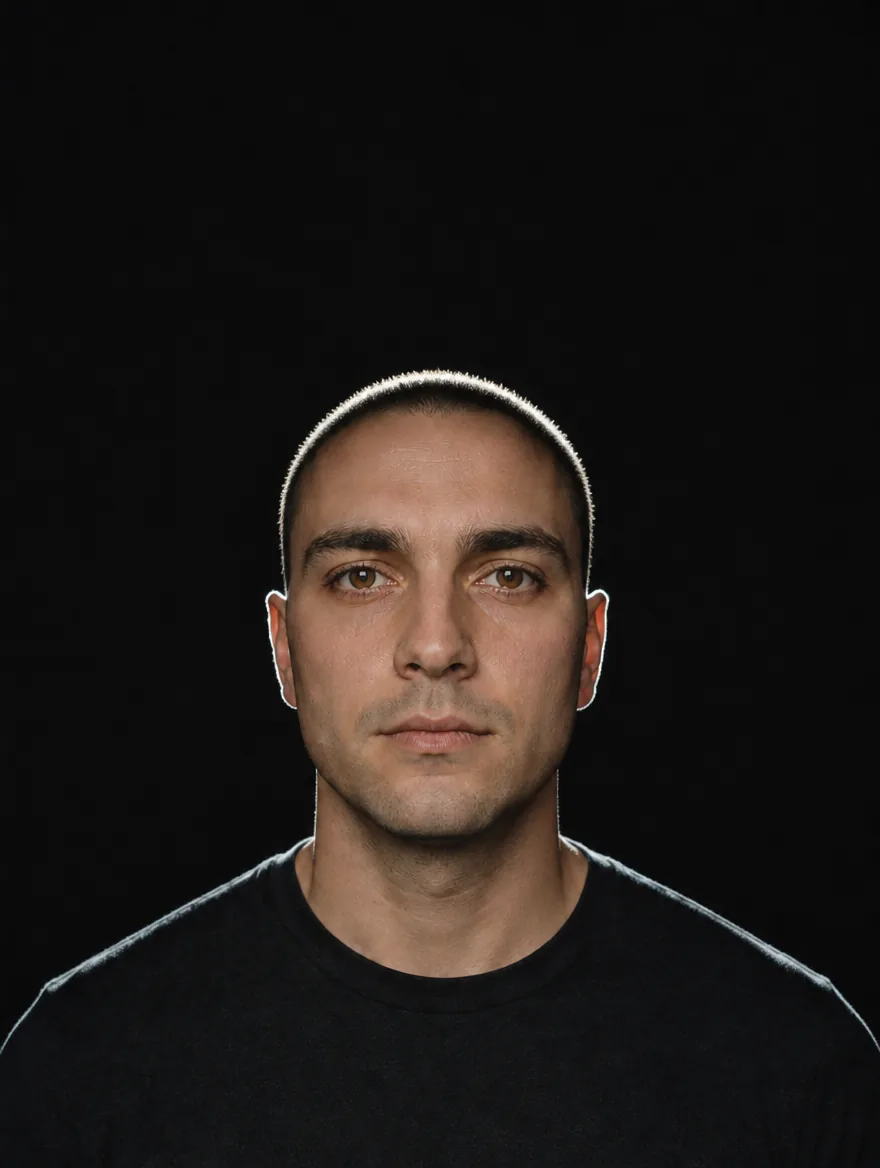
Same wall, separation lightEdge restored from behind

Same hair, lighter wallThe other fix
Light, blonde or grey hair on white fails in exactly the same way, inverted — and the two fixes are the same two fixes, reversed.
Six backgrounds, at the size casting actually sees

White
✓

Light grey
✓

Mid grey
✓

Blue
✓
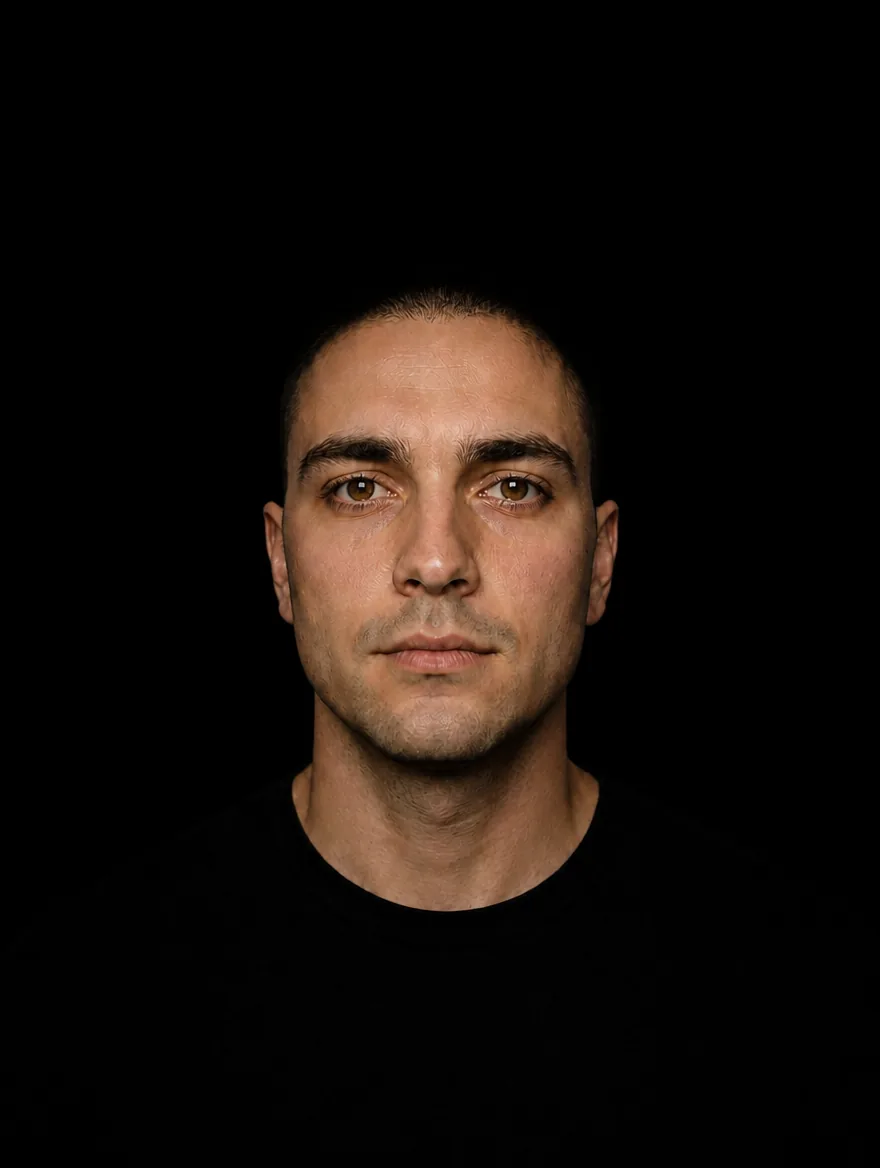
Near-black
✕
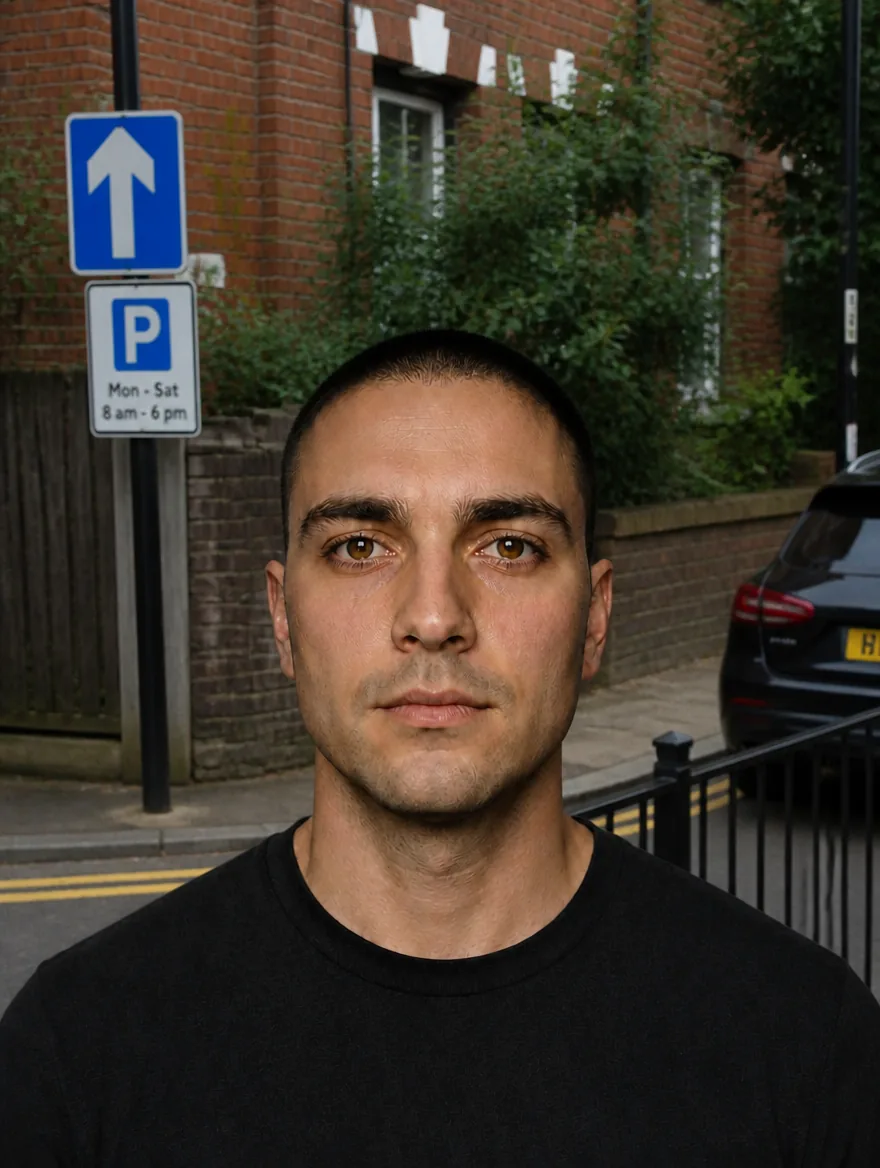
Busy outdoor
✕
Same face, same light, six backgrounds. The winner is the one where you can still find the edge of the head. The winner is not a colour. It is whichever one lets you find the edge of the head.
The advice about dark skin that is well-meant and backwards
You will read, in a lot of places, that you should never shoot dark skin against a dark background. It is offered kindly and it is not what the people who light dark skin professionally actually say.
“Another issue is dark skin tones against bright or burnt-out backgrounds. Again, be aware of the issue and balance accordingly. Keep the contrast under control.”Jim Sofranko, New York cinematographer — cinematography.net
The sourced hazard is the opposite of the folklore. The real trap is a blown-out or hot background — a white cyclorama, a bright window, an overcast sky behind the head. A hot background drags the camera’s exposure down to protect the highlights, and the face goes with it. That is how you end up underexposed, ashy, and silhouetted, and then somebody tells you the photograph is “dramatic.”
A dark background with good separation light is fine, and frequently beautiful. The criterion has not changed: can you see where the head ends?
Expose for the face, not for the room
The most transferable technical instruction in every cinematographer source we read is one line from Ava Berkofsky, who shot HBO’s Insecure:
“The trick is keeping [light] off the walls. If you keep it off the walls, you can expose for the faces and it still has a cinematic look.”Ava Berkofsky, cinematographer (Insecure) — Mic, 6 September 2017
This is the whole game. Light the face. Control what the background is doing. Then expose for the face and let the background fall where it falls.
What you are fighting is your camera. Auto-exposure averages the entire frame and splits the difference — it does not know which part of the picture is a person. Put a bright wall behind you and the camera will darken your face to save the wall. This is also precisely why auto-exposure fails darker skin, and why so many actors of colour have a folder full of frames where the room is perfectly exposed and they are not. On a phone, tap and hold on the face and drag the exposure slider down until the skin looks right and the background looks like whatever it likes. On a camera, meter the face. Either way: the face is the subject, so the face is the exposure.
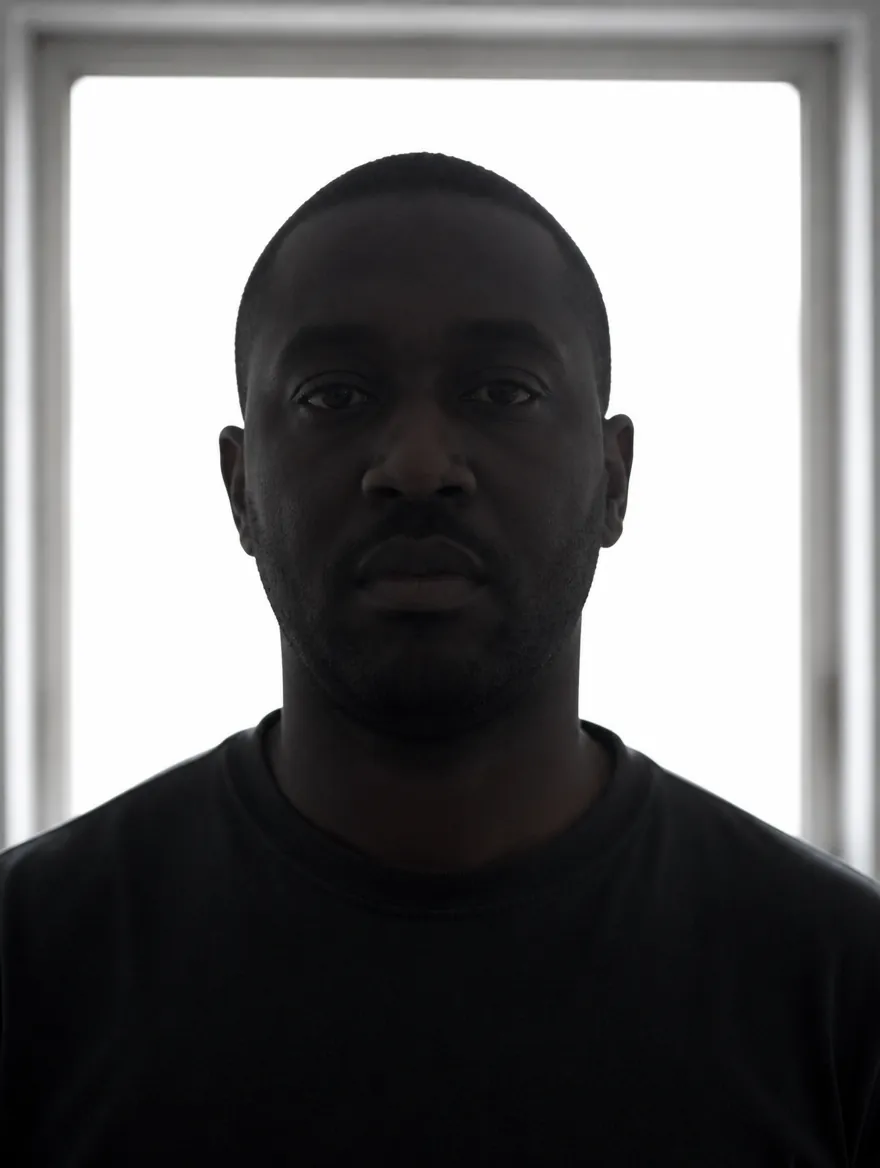
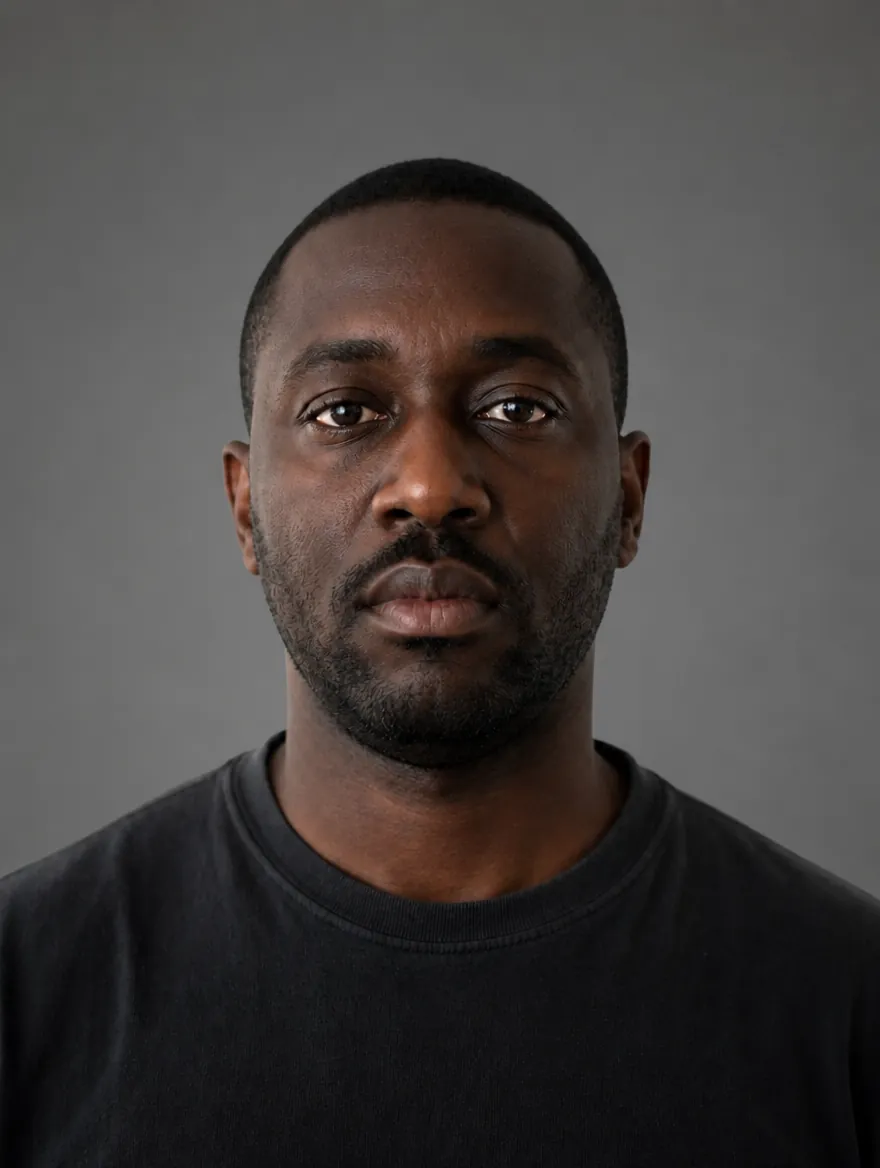
The camera does not know which part of this picture is a person. You have to tell it.
Three lights worth learning. That is all there are.
Every one of these derives from the same principle Berkofsky gave away for free: stand close to a soft source and turn three-quarters into it.
One: window and bounce. Free, and covered in full in the DIY chapter. A big window on the shady side, a white sheet on your dark side, every other light in the room off.
Two: one light and a modifier. A single source, softened, up and to one side. And remember that the catchlight takes the shape of the modifier — which means you can read any photographer’s entire setup, for free, by zooming into the eyes in their portfolio before you hand them a deposit.
Three: open shade outdoors. Not sun. Shade. The shadow side of a building, under a tree canopy, an overcast day. In open shade the whole sky becomes your light source — an enormous, soft, free modifier. And a Bond casting director is on record preferring it: Debbie McWilliams, “outside quite often seems to work better than a studio shot.”
Three setups, seen from above
Window + bounceBig soft source one side, white bounce the other
One light + modifierSingle source, softened, up and to one side
Open shadeThe whole sky becomes the source
Three setups. No studio. No money. And because the catchlight takes the shape of the modifier, you can read which of these three a photographer used by zooming into the eyes in their portfolio.
Direct sunlight is the enemy, and here is exactly why
Not a matter of taste. A matter of size.
The sun is a colossal object at a colossal distance, which means that from where you are standing it is a very small source — and small sources are hard sources. It is the same rule that made the window soft when you stood close to it, running in reverse. So direct sun gives you the three failures, and all three are the same failure: raccoon-eye shadows dumped into your eye sockets (which kills the catchlight, which kills the eyes, which kills the photograph); a hard black shadow off the nose; and a squint, because you are staring into it.
Every “shot outside in the sun” headshot fails for those three reasons, and they are one reason. The source is too small. Walk twenty feet into the shade and the sky takes over. It costs nothing and it takes twenty seconds.
Why size decides everything
Small source — hard light
The sun, a bare flash, a phone torch.
- Black shadow dumped into the eye sockets
- Catchlight tiny or missing — the eyes die
- Hard-edged nose shadow across the cheek
- Involuntary squint
Large source — soft light
A window up close, open shade, overcast sky.
- Shadow falls off as a gradient, not an edge
- Wide catchlight sitting high in the eye
- Nose shadow soft and short
- Eyes open, no squint
All three sunlight failures are one failure. The source is too small — so the shadow it casts has a hard edge, and every one of those problems follows from that single fact.


Twenty feet apart. One of them is free and one of them is also free.
Outdoor headshots: the honest trade
The case for: free, soft in shade, and a Bond casting director says she often prefers them to studio work.
The case against, and it is the only one: an outdoor background contains information. Leaves. Brick. A lamppost. A parked car. A stranger. And information competes with your face at exactly the moment when your face has 48 to 96 rivals already.
The fix is distance and lens. Get a long way from whatever is behind you, use a long lens — or your phone’s real telephoto — and reduce the whole world behind you to a soft, unreadable tone.
THE RULE THAT REPLACES ALL THE COLOUR LISTS
The background must not be a place. It must be a colour. The second a viewer can tell where you are standing, the background has stopped being a background and started being a scene — and you are now an extra in it.