Should You Film a Self-Tape Vertically or Horizontally?
Film theatrical self-tapes horizontally unless the instructions request vertical video. Use this practical check to frame, test and submit correctly.
By Sal Framondi
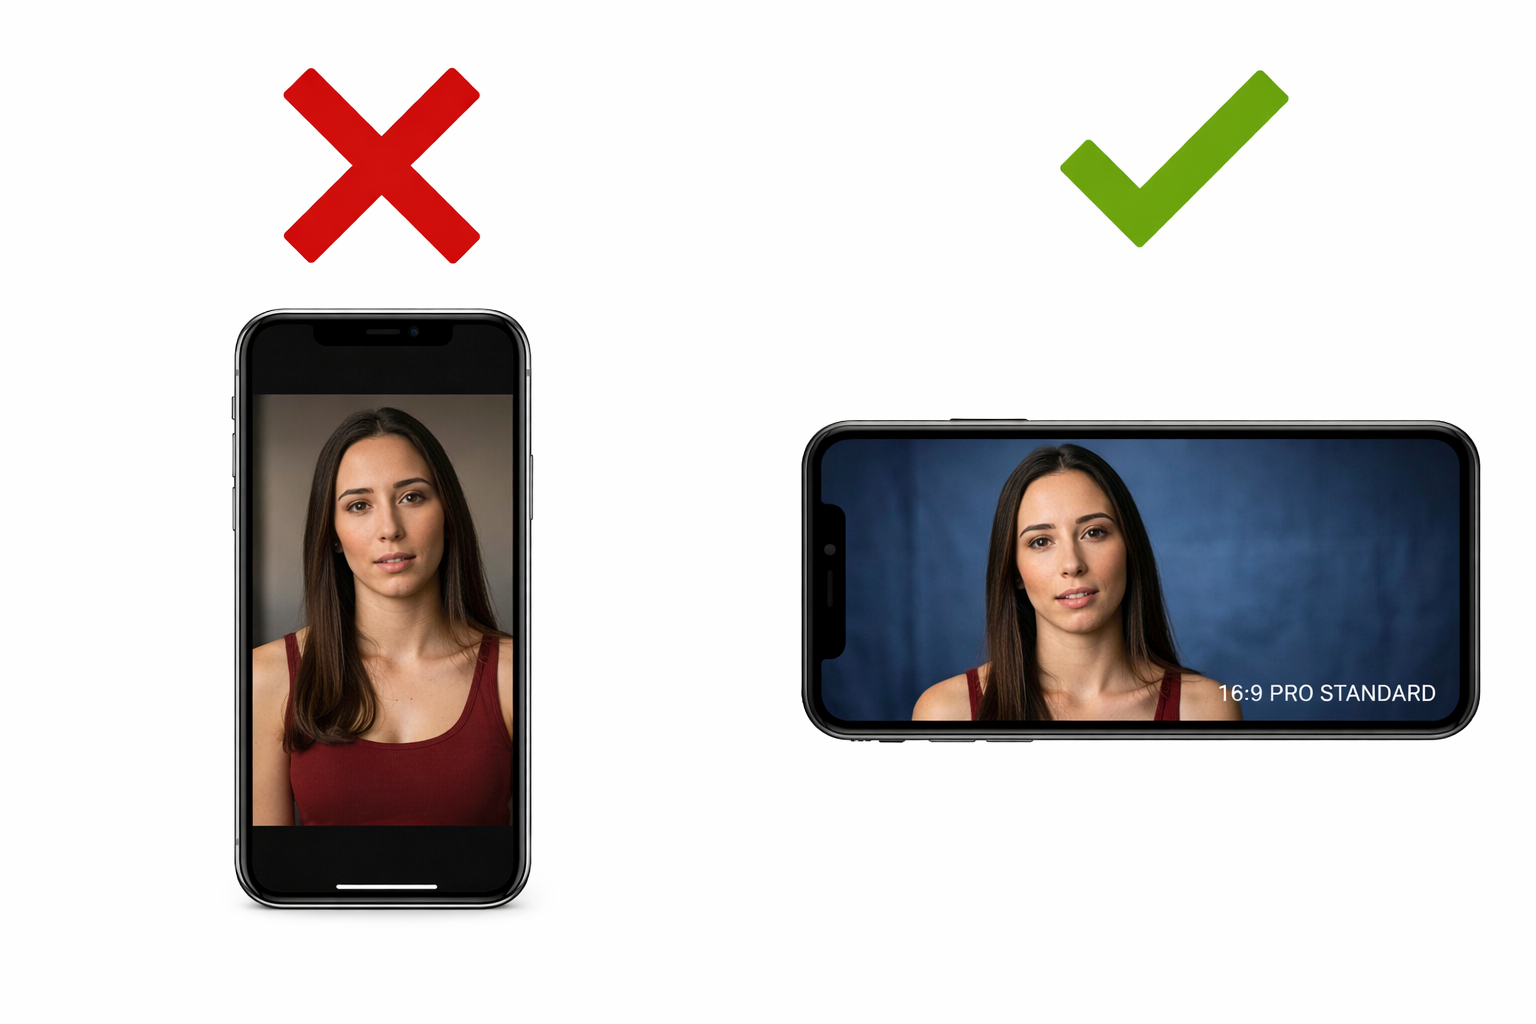
The short answer
For most film and television self-tapes, turn the phone sideways and record horizontally. Use vertical framing only when the casting instructions specifically ask for it, such as a social-first commercial or phone-style scene.
The deciding factor is not what looks best on your own phone. It is the requested format and whether your framing lets the viewer see your face, eyeline and physical choices clearly. Read the full instructions before setting the tripod, because changing orientation after recording usually means cropping or recording again.
Why horizontal is the practical default
A horizontal frame gives you room for a close-up or medium close-up without squeezing your shoulders against both edges. It also leaves usable space toward the reader, so the eyeline feels connected rather than pinned to the center of a narrow frame.
That extra width is useful when a scene includes a shift in focus, a small physical adjustment or more than one off-camera relationship. It does not mean you should fill the frame with empty background. The point is to compose a stable image in which your face remains easy to read.
Horizontal video also matches the shape used by most film and television scenes. That makes it the sensible starting point, but it is not permission to ignore a request for another format. The breakdown or portal instructions always take priority over a general convention.
When vertical video is the right choice
Some auditions are designed to resemble content viewed on a phone. A brief may request vertical framing for a social video, creator-style advertisement or a scene that is meant to look as if a character recorded it themselves. In that case, follow the request rather than converting the idea back to a traditional widescreen setup.
Look for words such as vertical, portrait, 9:16 or social format. If the brief supplies a framing example, match that example. If it says nothing about orientation, use the same established horizontal setup you use for your other theatrical tapes.
Do not create both versions unless the instructions invite alternatives. Extra files can make a submission harder to review. When the direction is genuinely unclear and you have a contact for questions, ask one concise question before filming.
Set the orientation before you rehearse
Place the phone in its final position before you mark the floor, set the reader or choose the eyeline. Lock screen rotation if your device tends to change orientation when it moves. Record a short test, stop it and play the actual file back rather than trusting only the camera preview.
Check that the image opens upright, your eyes are visible, the top of your head is not cut off and your shoulders fit the requested shot. Make sure the reader is close enough to the lens for a believable eyeline but does not pull your gaze so far sideways that the viewer loses your eyes.
For more on camera placement and framing, use the self-tape camera guide. The fundamentals belong there; this decision is simply about choosing the right canvas before applying them.
Do not fix orientation by careless cropping
A vertical recording cannot always become a good horizontal tape by cutting away the top and bottom or enlarging the center. Cropping may remove a gesture, push the eyes too close to the top edge or make a clean image look soft. Adding large side bars preserves the full picture but does not create the composition you intended.
If you discover the mistake before the deadline and can repeat the performance safely, reset the phone and record again. If a retake is impossible, preserve the face and audio rather than forcing an aggressive crop. Then confirm that the exported file opens in the correct orientation.
Editing should be limited to what the instructions allow. The self-tape editing guide covers clean starts, endings and exports without distracting from the acting.
Frame the performance, not the room
Once the phone is horizontal, resist the urge to use all of that width. Move the camera closer or adjust the lens so the requested shot is clear. A close-up should still feel like a close-up; horizontal does not mean a wide shot.
Keep the background simple and check all four edges. Remove lamps, door frames or furniture that appear to grow from your head. If you use a tripod, make sure it cannot drift during the take. A stable frame helps the viewer stay with the scene.
Rehearse once while watching the frame boundaries. Then stop watching yourself and play the scene. Orientation is a technical decision you should finish before the performance begins.
Before you upload
Use this final check: read the orientation request again; play the exported file from beginning to end; confirm it opens upright; confirm the framing still matches the requested shot; listen through headphones; and verify that the filename and file type match the portal instructions.
If the tape is too large after export, do not reduce it repeatedly in several apps. Keep the clean original and make one submission copy with the self-tape compressor, then inspect that copy before uploading.
Handle unusual requests without guessing
A mixed request may ask for a horizontal performance and a separate vertical introduction. Treat those as different deliverables. Label them clearly, record each in its intended orientation and inspect both after export.
If you are using an external microphone, monitor the cable when rotating the phone. A connector can pull against the mount or move into frame. Recheck focus, exposure and sound after every physical change to the setup.
Make the format invisible
The right orientation should disappear once the scene starts. Follow the instructions, compose the frame deliberately and test the finished file. Then let the performance, not the shape of the video, hold the viewer’s attention.